Print reference code from the explore page
In this instruction it is explained how to print a reference code from the explore page.
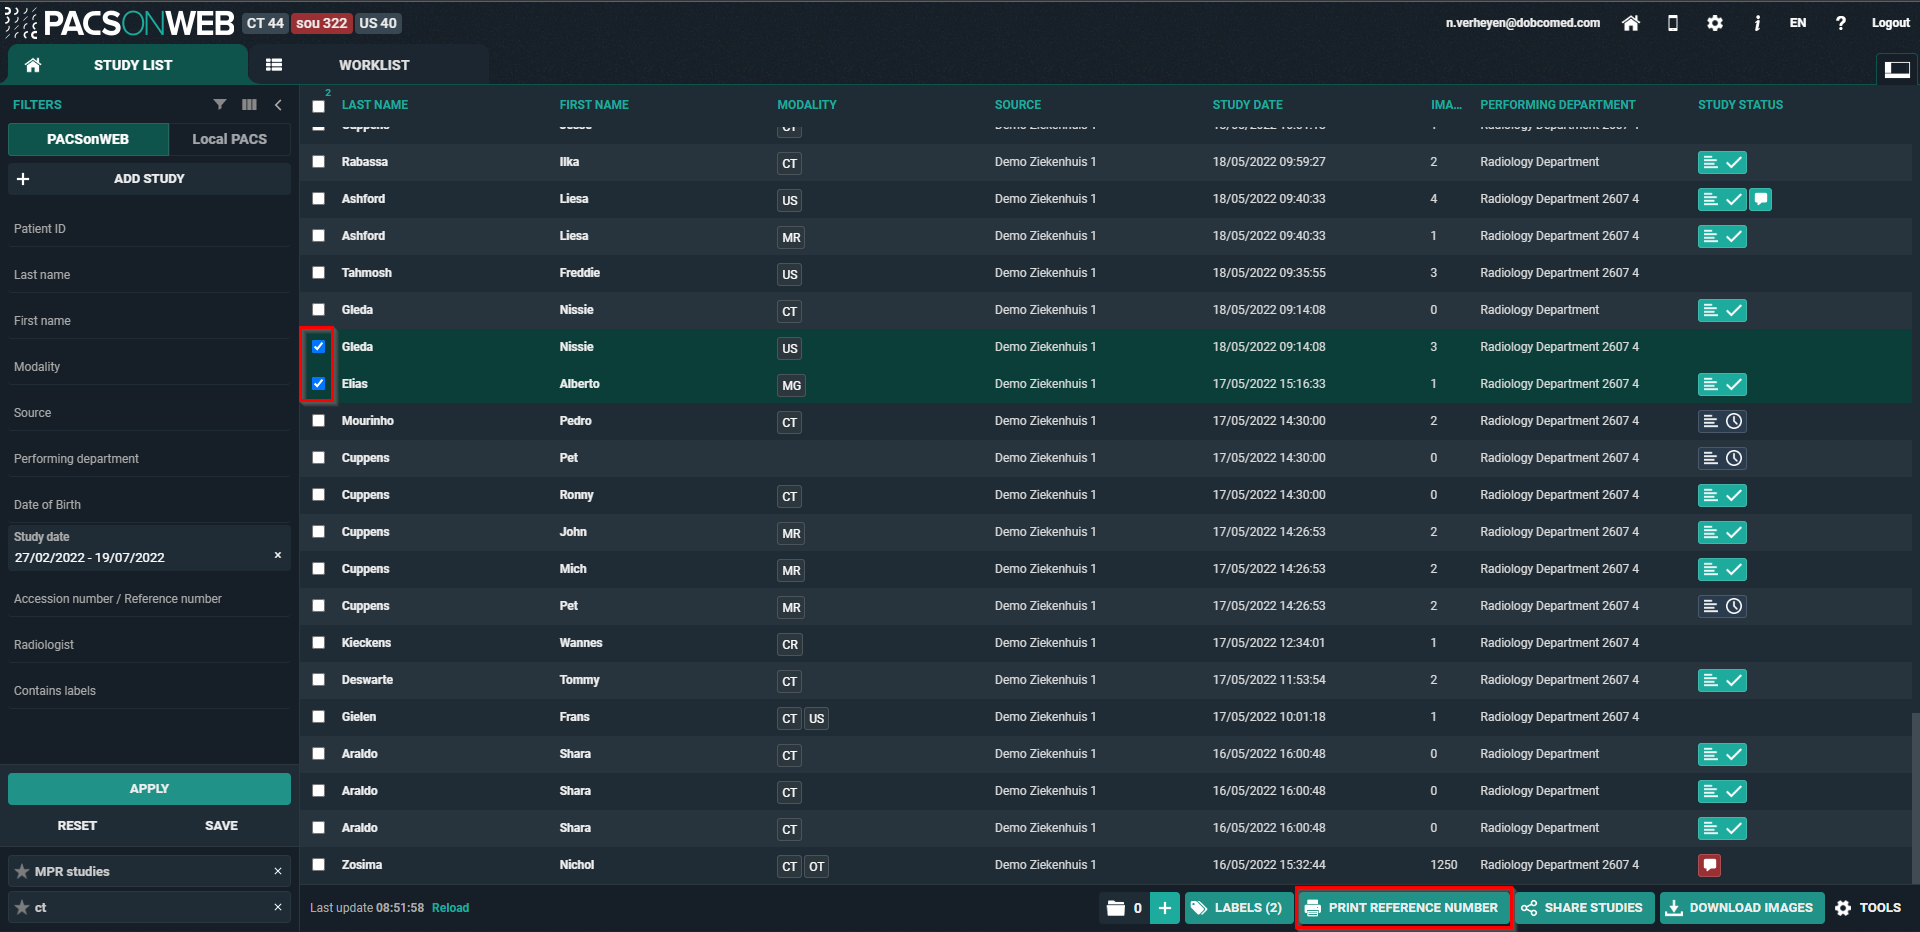
STEP 1: Select the studies for which you want to print a reference code
Select the studies for which you want to print a reference number and click the following button at the bottom of the page: Print reference number.
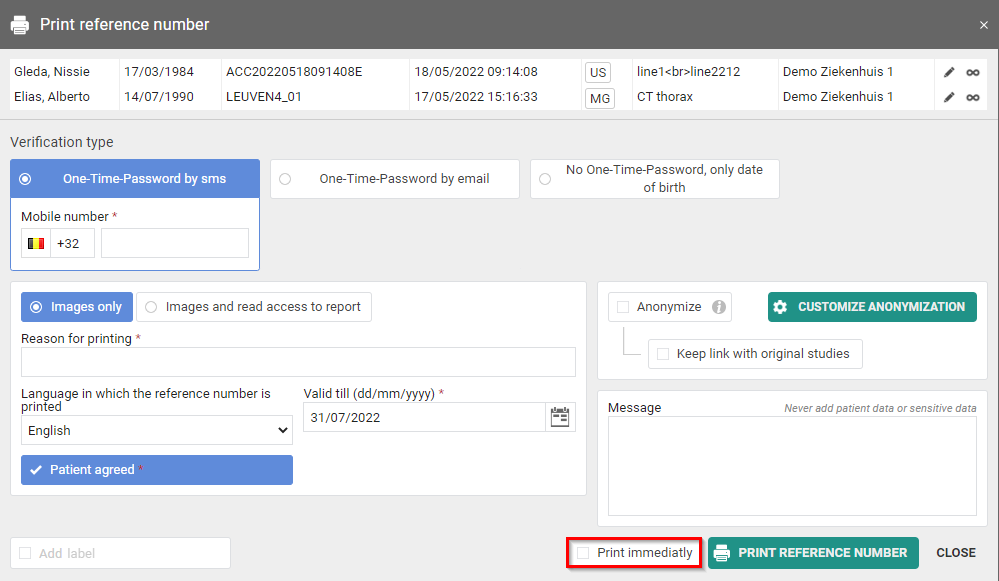
STEP 2: Choose the verification type
There are 3 possible verification types:
1) One Time Password by SMS

2) One Time Password by email

3) No One Time Password, only date of birth

 | Important! If, in case of verification type 1 or 2, the user gives an erroneous OTP 5 times in succession, the bucket is blocked. The bucket can be unlocked by the Service desk or an admin user of the sending radiology department (see Status Forwarding ). |
STEP 3: Parameters for sharing
1. You can choose to print a reference code for:
• Images only
• Images and read access to report
2. You need to fill out a "Reason for printing". This reason will not be printed but is mandatory and will be registered in DeepUnity PACSonWEB.
3. The language, used for printing the document:
By default the display language of DeepUnity PACSonWEB is selected but you can change the language from the drop down menu.
4. Valid till (dd/mm/yyyy)
By default the validity period is set to 1 month but you can change this by:
• filling out the desired time period manually.
• selecting a date, using the calendar icon
 | Tip: The default validity period can be configured for each sending radiology department. DeepUnity PACSonWEB offers the possibility to define a default or maximal validity period. In case a specific configuration is desired, please contact the service desk. The option 'Unlimited access' is not available when printing a reference number. |
5. Patient Agreed
The "Patient agreed" checkbox must always be checked. Without the patient’s consent reference number may not be printed.
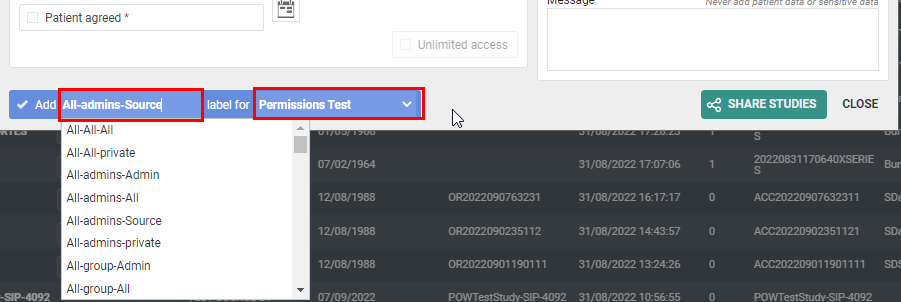
6. Add a label
With this option a label can be attached to the study.
Enable the checkbox to select a label. Additionally the label can be set for the user or a group.
7. Optional settings:
• Anonimyze:
This replaces the name of the patient:
◦ In DeepUnity PACSonWEB, the first name is replaced by a number and the last name is replaced by Anonymous
◦ In the letter, only the last name 'Anonymous' is mentioned
 | Attention: The report for an anonymized study will never be accessible, even if you selected the option 'Images and read access on the report'. |
• Message: In case a message is entered when printing the reference code, the message is not available as a separate series within the exam and no label 'message' is added.
It is added to the letter that is being printed.
8. Print immediately:
If this option is selected, when clicking on "Print Reference Number" a document will be opened for printing with instructions for the patient.
If not, only the confirmation screen is shown.
| Tip: When printing a reference number, the same values for the following parameters are selected automatically with the next printing of a reference number: • One-Time-Password by mail / text message / none • One-Time-Password by text message: country prefix • Language |
STEP 4: Confirmation
A pop-up window with the information about the printed reference number will be displayed.
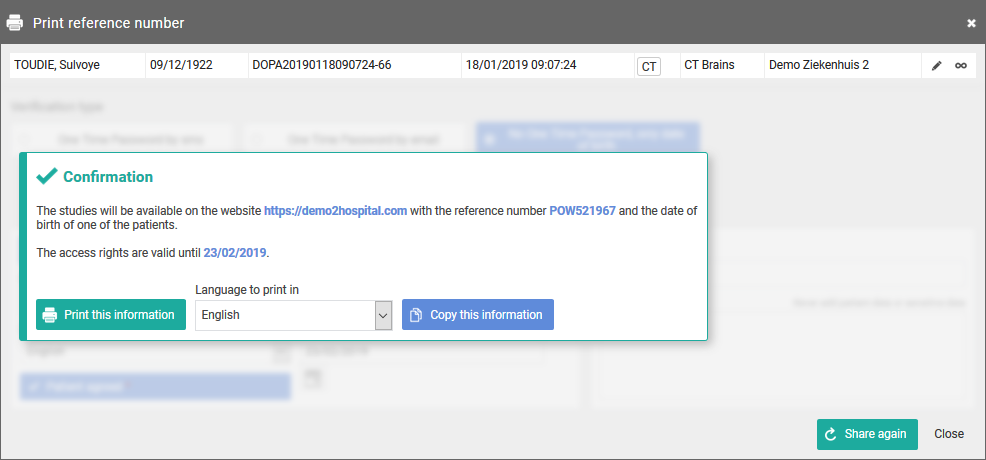
With the button Copy this information, the content of the pop-up is copied to the clipboard so e.g. it can be pasted into your own email.
You can print the same letter with reference code again in another language from the confirmation screen.